Galley cupboard behind the cooker box


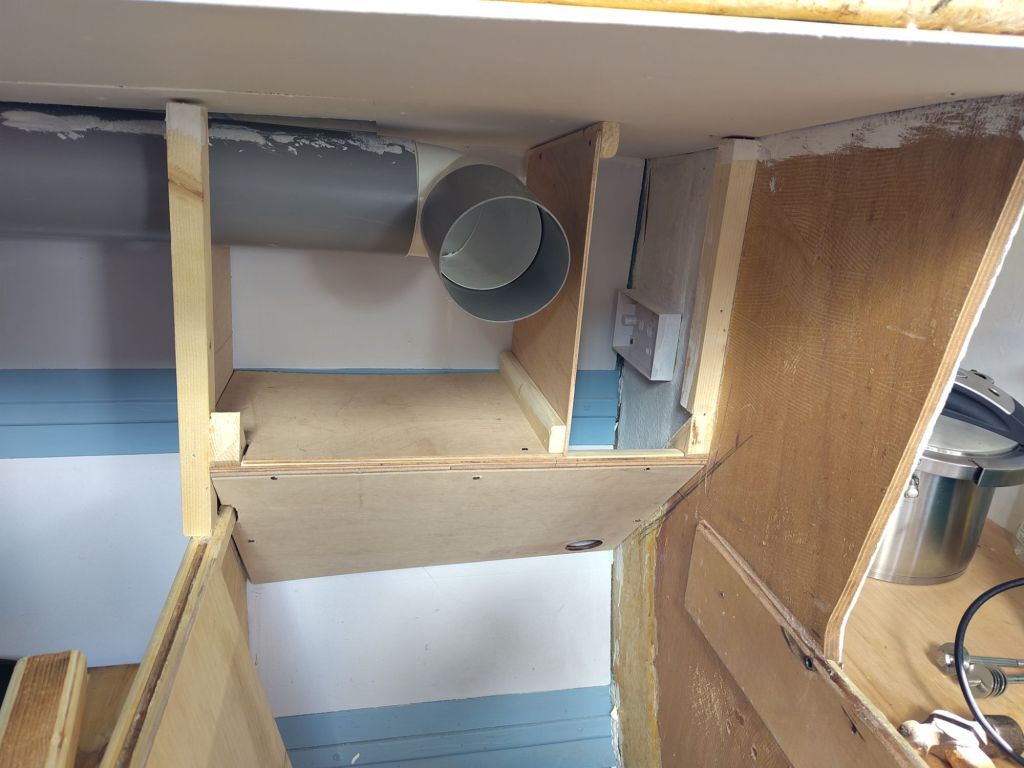
This is nearly where I started today. The side supports for the sloping part of the cupboard behind the cooker box were already screwed and glued in. I had also scraped away the excess foaming glue.
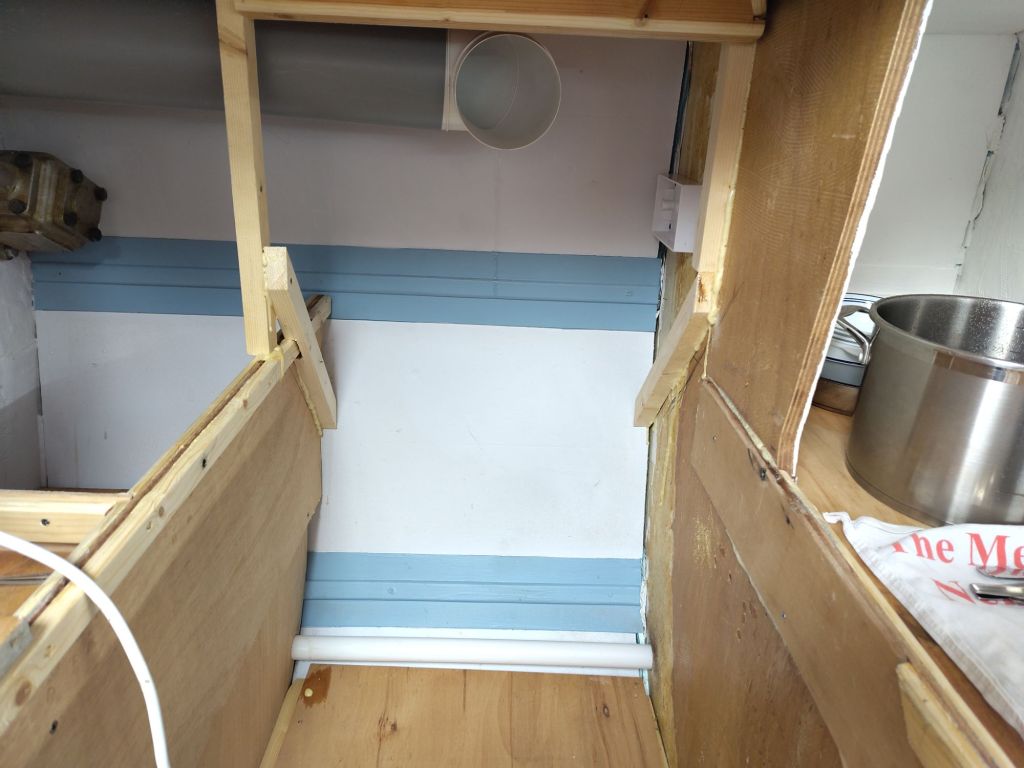
First job was the aft side piece. Due to the alignment with the upright I decided to use two pieces. So far I have the side that will be between the two cupboards. I deliberately didn't go for a full fit around the dehumidifier pipe as it will be good to have air circulating around these spaces.
Then a shelf with two support pieces. One under the shelf on the aft side and the other under the inboard edge attached to the sloping front.
We decided to have a quite small access to the sloping section of the cupboard. You can get an arm in and this will be used for storing things like sealed extra bags of lentils, coffee beans etc that are not needed very frequently. I've fitted a batten for the next divider where the extractor pipe ends.
Note the hole in the forward end of the sloping section, this is for the moulded on plugs of the induction hob and microwave to pass through on their way to the mains sockets above.
In theory I suppose the socket switches should be more accessible. However, there is no easy place for them given the length of the cables on the microwave and hob. So I'll route the supply via a fused spur switch that can be reached even if your pan is on fire.
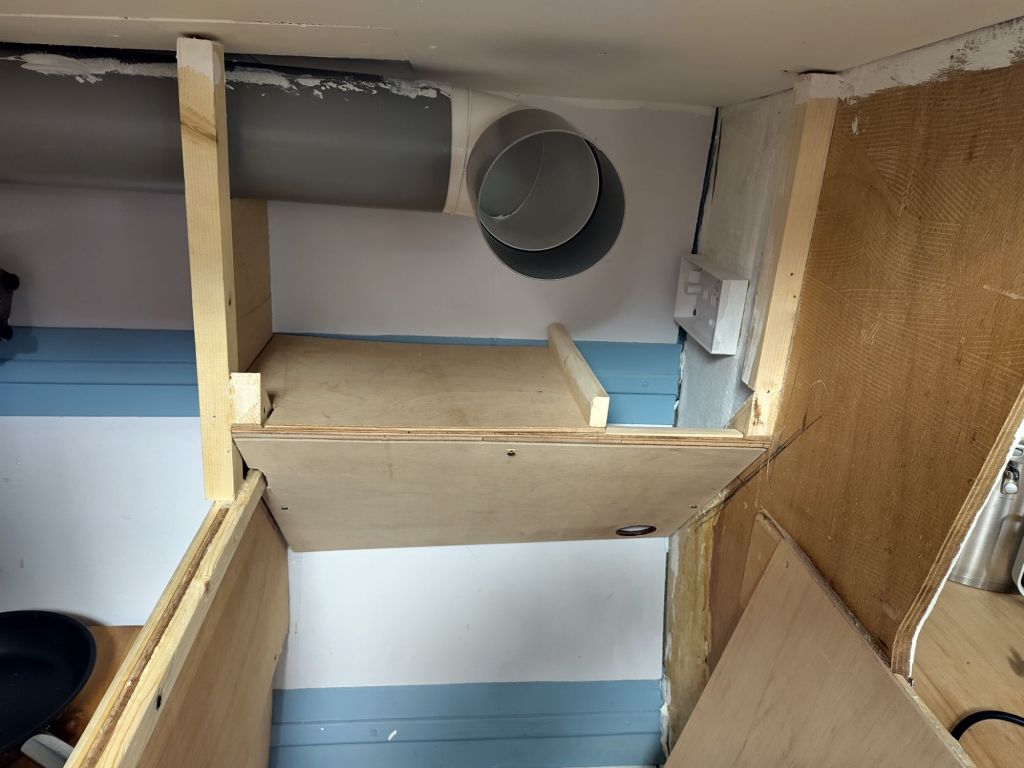
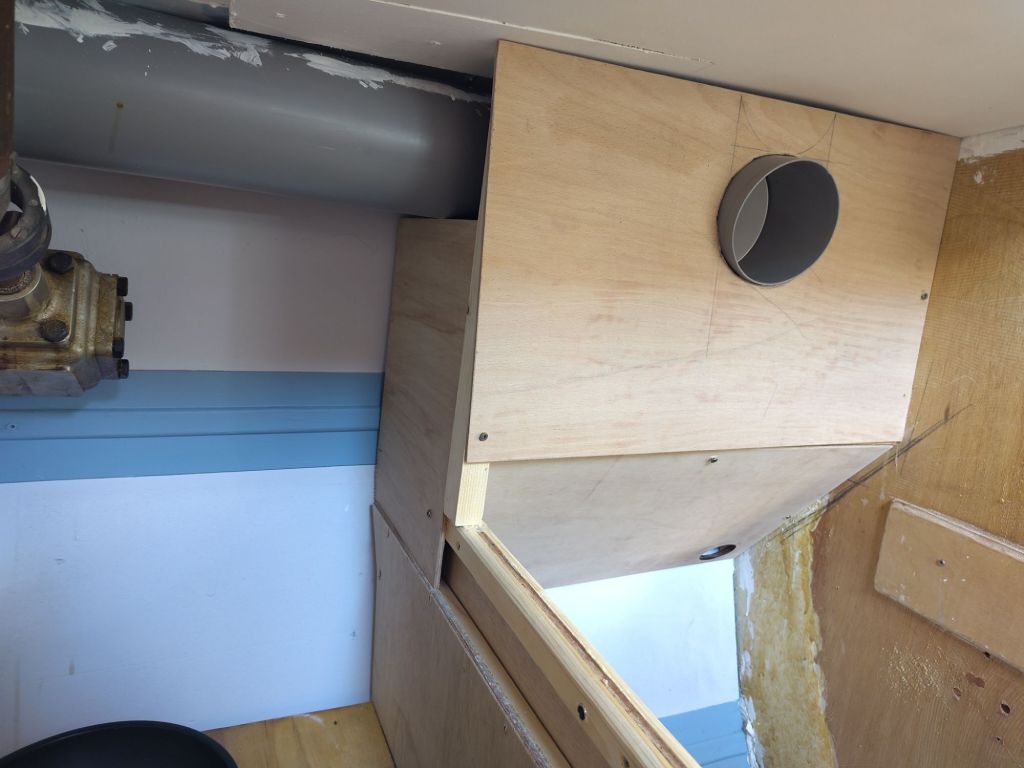
The extra divider is now fitted. The top batten screws into the batten for the headlining. I am going to add an extra shelf in the forward section that will sit just above the electrical socket.
The angle of the sloping section looks a bit odd. However, I have checked. My verticals and horizontals are correct (the deck itself is not horizontal in either direction and the hull curves. When the cooker box is installed and tilts it touches the hull and this sloping piece at the same time. At that point the bottom of the sloping piece is invisible anyway.
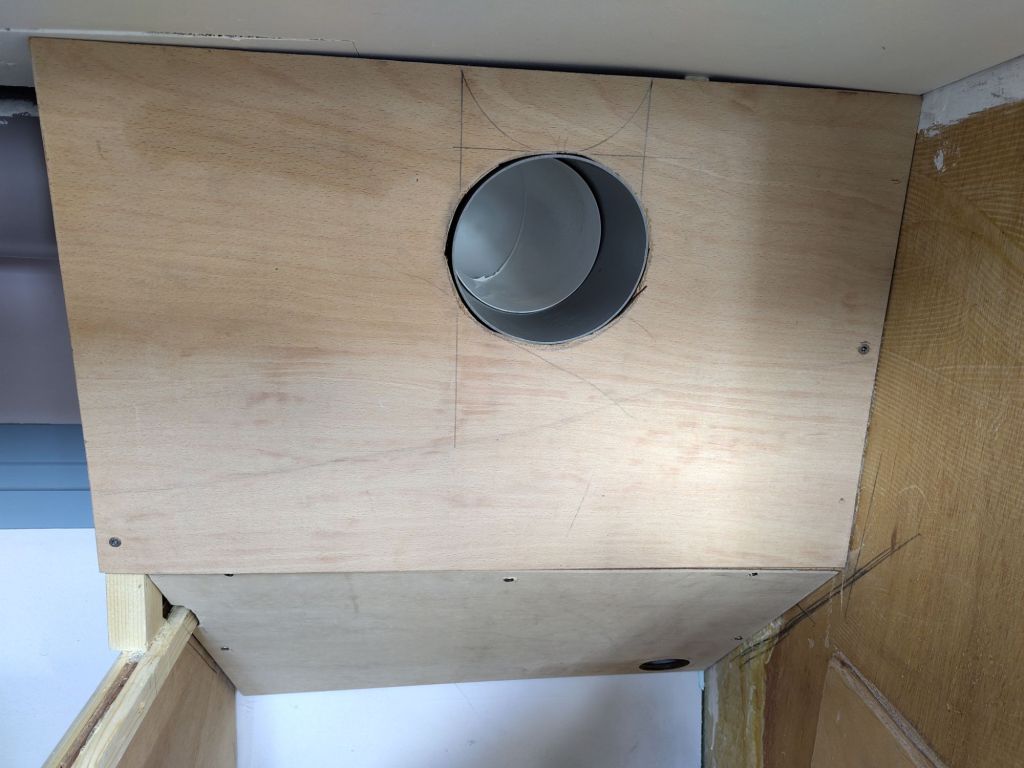
This is what the front face currently looks like. The hole is the "extractor" which leads to our Ecor Pro Dryboat 1200 dehumidifier (the unit is in the cockpit locker, the wet outlet is into the cockpit and the dry air into the aft heads).
I still have to cut the "doors" into the front face. There will be one each side of the extractor pipe. Both nearly full height, both held in by wood toggles.
So far everything is dry fit and held by just a few screws. Some, otherwise inaccessible faces will be painted while it is disassembled. It will all be glued and screwed together.
The neither the hull nor the deck are cored. So we have fully insulated them (5mm foil backed self adhesive foam and 40mm xps foam). There are no bolt or screw holes in the hull or deck behind this insulation.